Running Gitea on a portable NAS behind Cloudflare Tunnel
I run Gitea on an ARM64 NAS that I carry between networks. Its local IP can change whenever it joins a different Wi-Fi network, but I wanted one HTTPS URL for my Git remotes. Cloudflare Tunnel gives it that address. A cloudflared container on the NAS connects out to Cloudflare, so the router does not need an inbound port forward.
The domain and paths below are examples. The offline image workflow is a reproducible procedure. The verification section describes what I tested on the actual deployment.
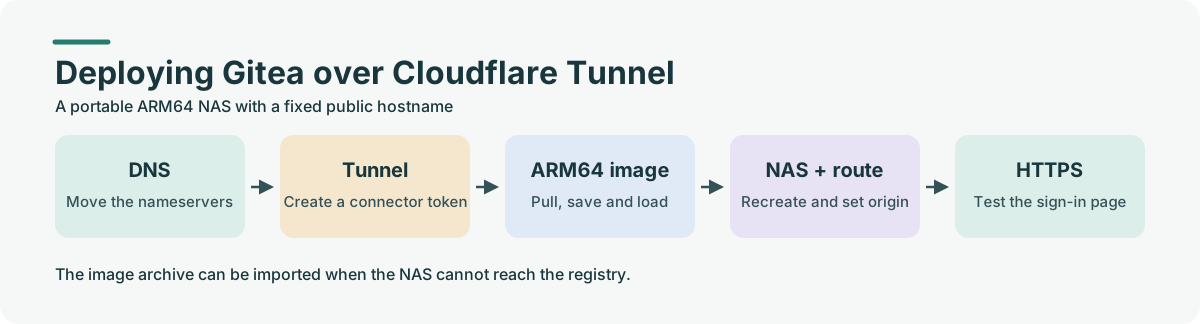
1. Move authoritative DNS to Cloudflare
Add your existing domain, such as example.com, to Cloudflare and select Free. The current registrar still handles domain renewal. You change the nameservers at the registrar after checking the records in Cloudflare. An existing .cn domain can use this setup if its registrar lets you change its nameservers.
Compare Cloudflare's scanned records with the old zone. For Fastmail, carry over your MX priorities, SPF, DKIM, and any existing DMARC record. Set DKIM CNAME records to DNS only and leave flattening off. Copy the DKIM targets from the mail provider. A CNAME pointing at an MX server keeps failing validation no matter how long you wait. If DNSSEC was enabled, follow the migration guide for the old DS record and its cache before switching nameservers.
Replace the nameservers in your registrar's dashboard with the pair assigned by Cloudflare. Wait for the zone to show Active, check public DNS, then recheck DNS and test mail in your mail provider's dashboard.
nslookup -type=ns example.com 1.1.1.1
Cloudflare full setup · Fastmail on Cloudflare DNS
2. Create the tunnel and get the ARM64 image
Go to Networking → Tunnels → Create Tunnel in Cloudflare. Name it gitea and choose Docker on the connector setup screen. The generated command supplies the value after --token. You can find the installation command again under Add a replica. Anyone with a tunnel token can run a connector, so keep it out of screenshots, logs, and version control. Cloudflare Tunnel setup · Tunnel tokens
The NAS rejected the first image for an architecture mismatch. On the 64-bit ARM NAS, select the official latest-arm64 tag. You can pull it directly from the NAS registry UI if that works. For an offline import, run these commands on another computer with Docker and Docker Hub access. The download computer can be x86-64 because the pull explicitly targets ARM64.
docker pull --platform linux/arm64 cloudflare/cloudflared:latest-arm64
docker image inspect --format '{{.Os}}/{{.Architecture}}' cloudflare/cloudflared:latest-arm64
docker save -o cloudflared-arm64.tar cloudflare/cloudflared:latest-arm64
Confirm the second command prints linux/arm64. Transfer the tar file to the NAS. In the ZSpace Docker → Images page, use the local image import and confirm that cloudflare/cloudflared:latest-arm64 appears in the image list. On the NAS command line, the equivalent is:
docker load -i cloudflared-arm64.tar
The archive preserves the image and its tag. Configure the container and its tunnel token after importing. Official image tags · Docker image commands
3. Recreate the connector container
If an earlier connector used the wrong image, stop it and create a replacement from the imported ARM64 image. Use the NAS interface's rebuild option when available to apply changes to the command or environment.
| Setting | Value |
|---|---|
| Image | cloudflare/cloudflared:latest-arm64 |
| Network | Default Docker bridge |
| Command | tunnel --no-autoupdate run, with the default image entrypoint |
| Environment | TUNNEL_TOKEN set to the full connector token |
| Published ports | Leave empty |
| Start on boot | Enabled |
My first container used a lowercase environment variable called token. It repeatedly exited with a message asking for a tunnel ID or name. The connector reads TUNNEL_TOKEN from the environment. You can also pass the same value using tunnel --no-autoupdate run --token <TUNNEL_TOKEN>. Look for Registered tunnel connection in the logs and Healthy in Cloudflare. If connections fail, check outbound access to port 7844. Run parameters · Firewall requirements
4. Set the origin and resolve the 502
Gitea runs in host network mode and listens on 0.0.0.0:3000 over HTTP. First test it on the LAN using the NAS address, for example http://192.168.50.10:3000/. If replacing an existing Gitea container, check the mounts, back up the application data, and stop the old instance before starting its replacement. My two Compose projects shared /data, which contains SQLite, repositories, and LFS data, so I ran one instance at a time.
Set the public URL in the Gitea Compose environment and recreate the Gitea container to apply it. Its local HTTP listener still uses port 3000.
environment:
  - GITEA__server__ROOT_URL=https://git.example.com/
  - GITEA__server__HTTP_PORT=3000
Open Routes → Add route → Published application in the tunnel. Set the subdomain to git, select example.com, and leave the path blank. Set Service URL to http://172.17.0.1:3000, substituting the actual IPv4 gateway shown in the connector container's network details. In this setup that gateway is the NAS's address on the Docker bridge. Cloudflare creates the public DNS record when the domain uses the full DNS setup.
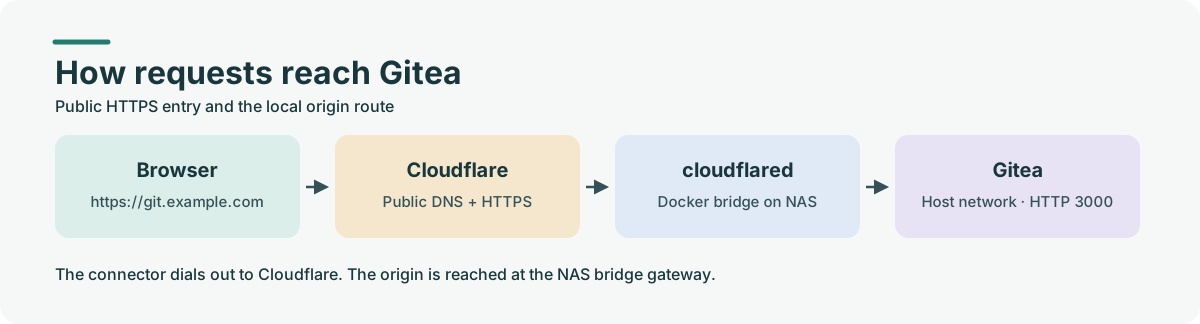
My first route used http://localhost:3000 and returned a 502. Gitea shared the NAS network stack, but the connector used Docker bridge networking. From the connector, localhost pointed back to its own container. The NAS's LAN IP worked as an initial test. I then switched to the bridge gateway so the origin would survive a change to the NAS's Wi-Fi address. If both containers share a user-defined Docker network, the connector can instead use Gitea's service name and container port. Docker bridge networks · Cloudflare troubleshooting · Gitea reverse proxies
5. Verify the public HTTPS endpoint
Load https://git.example.com/, then open the sign-in page. Both pages loaded over public HTTPS in this deployment. I did not test roaming between Wi-Fi networks, authenticated private repositories, or Git pull and push. For your own setup, try opening the site on cellular data and cloning a test repository from another network. This route serves Git over HTTPS. Git over SSH needs its existing LAN route or a separate setup.
Optional: direct access on the LAN
I use the tunnel on both networks for now. For large local clones, a later option is split DNS on a router or resolver you control. Override git.example.com on the LAN so it resolves to the NAS, where an HTTPS reverse proxy on port 443 forwards to Gitea on port 3000. A Let's Encrypt DNS-01 certificate makes the same HTTPS URL work without exposing the proxy's port to the Internet. Public DNS still sends remote clients to the tunnel, and the Git remote stays the same.
A travel router can supply the same override when the NAS and laptop connect to its Wi-Fi. The direct route bypasses Cloudflare-side access policy, so account for that when configuring who can use the LAN endpoint. DNS rewrites · Let's Encrypt DNS-01