Two CUDA Development Environments on Windows 11: WSL and Native Toolchain
After installing the latest driver, set up WSL2 and your Linux subsystem. Windows 11 makes this straightforward:
- Enable WSL: Open PowerShell as administrator and run:
dism.exe /online /enable-feature /featurename:Microsoft-Windows-Subsystem-Linux /all /norestart
dism.exe /online /enable-feature /featurename:VirtualMachinePlatform /all /norestart
Then restart. Windows 11 also offers a faster approach: run wsl --install directly in PowerShell to enable WSL2 and install the default Ubuntu subsystem automatically.
- Upgrade the WSL kernel: Ensure your WSL2 kernel is current. Windows 11 typically pushes the latest WSL kernel through system updates, but you can also update manually:
wsl --update
The kernel must be at least 5.10.43.3 to support GPU features. Check your kernel version from PowerShell with wsl cat /proc/version.
- Install an Ubuntu distribution:
# 查看可用的wsl发行版
wsl --list --online

# 安装ubuntu
'wsl.exe --install ubuntu
After installation, run wsl from PowerShell to enter Ubuntu and perform basic system configuration.
With these steps complete, your WSL2 + Ubuntu foundation is ready.
Configuring the Local Toolchain and CUDA Environment
On Windows, you can configure CUDA in two ways: a native toolchain or a WSL toolchain. Both allow development in VSCode. The sections below cover each approach.
Native Toolchain
The native toolchain means installing and configuring all development tools directly on the Windows host, including Visual Studio and the CUDA Toolkit.
Install Visual Studio and C++ Desktop components: Install Visual Studio 2022 (use the latest version) and select the Desktop development with C++ workload. This ensures you have the MSVC compiler and Windows SDK. The workload automatically installs all required C++ development tools.
Note: You must install the C++ Desktop development component. Without it, you have no native C++ toolchain.
Configure environment variables: To allow the CUDA compiler (nvcc) and MSVC compiler to work, add the Visual Studio MSVC tool paths to your system PATH. Adjust the paths below for your VS version:
C:\Program Files\Microsoft Visual Studio\2022\Professional\VC\Tools\MSVC\14.43.34808\bin\Hostx64\x64
You can set these manually through system environment variable settings, or run from PowerShell:
setx PATH "C:\Program Files\Microsoft Visual Studio\2022\Professional\VC\Tools\MSVC\14.43.34808\bin\Hostx64\x64;$env:PATH"
Install CUDA Toolkit: Download and install CUDA 12.9 locally, using the default installation path (usually C:\Program Files\NVIDIA GPU Computing Toolkit\CUDA\v12.9). Ensure you select the NVIDIA driver and CUDA Toolkit during installation. The CUDA bin directory is automatically added to PATH afterward.
Verify the installation:
Create a hello.cu file locally:
#include<stdio.h>
__global__ void cuda_hello(){
    printf("Hello world from GPU\n");
}

int main(){
    cuda_hello<<<4,8>>>();
    cudaDeviceSynchronize();
    return 0;
}
Compile from PowerShell with
nvcc .\hello.cu -o hello: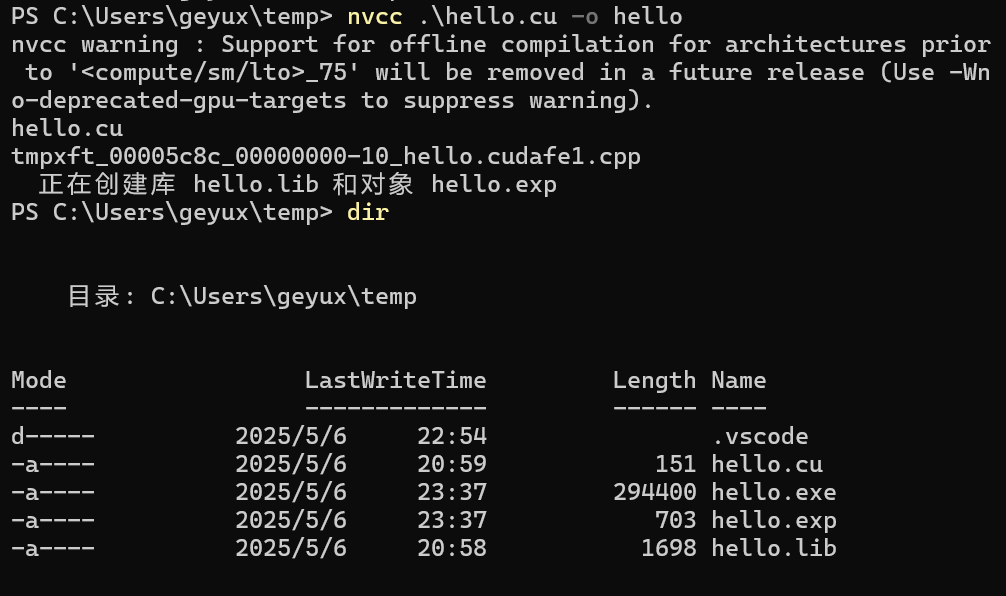
Run the hello.exe program:
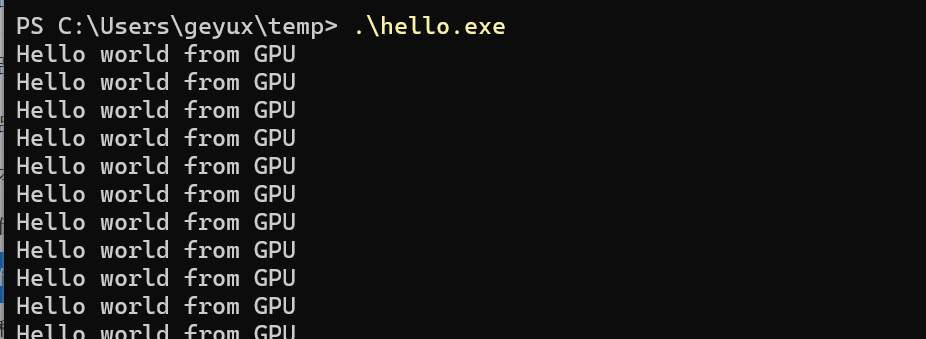
WSL Toolchain
To run and debug CUDA programs in WSL2, configure CUDA in your WSL2 Ubuntu environment:
- Install CUDA Toolkit: In WSL2 Ubuntu, install the CUDA Toolkit:
wget https://developer.download.nvidia.com/compute/cuda/repos/wsl-ubuntu/x86_64/cuda-keyring_1.1-1_all.deb
sudo dpkg -i cuda-keyring_1.1-1_all.deb
sudo apt-get update
sudo apt-get -y install cuda-toolkit-12-9
Verify CUDA installation: After installation, run
nvcc --versionto confirm. The output should show the compiler version:
Create a hello.cu file in Ubuntu and compile it with
nvcc ./hello.cu -o hello:
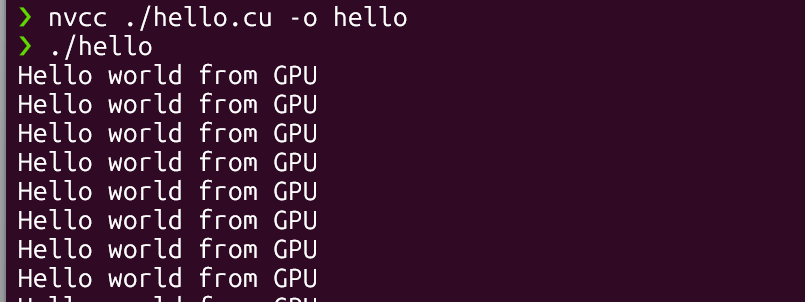
Install VSCode and the Remote extension: On Windows, install Visual Studio Code and add the Remote - WSL extension. This lets you edit and run WSL code directly from VSCode. Use the Remote-WSL: New Window command to open a WSL2 folder and start editing.
Next Steps
This covers basic setup for editing CUDA code in VSCode using either a local or WSL toolchain. Debugging configuration is not addressed here and may be covered in future articles. Both approaches give you efficient CUDA development on Windows 11 and let you make full use of your NVIDIA GPU.